Friday, September 27, 2013

Creating Lowlights and Highlights for Your Hair Extensions

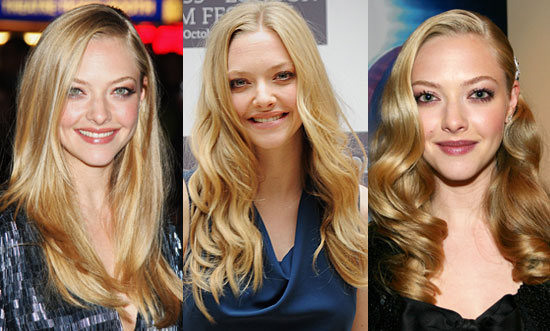
Creating Lowlights for Your Hair Extensions


For those who wish to create some glamorous lowlights within their new set of hair extensions, the process may seem daunting and unfamiliar to those who have not done this before. Many things can and often do go wrong if certain steps are not taken to ensure correct application. Fortunately, we have created a step by step to help you achieve great looking results in the comfort of your own home.
Tools Needed

• Semi-permanent hair dye. Be sure to buy darker colored hair dye then your extensions.
• Gloves.
• Mixing bowel and color application brush.
• Paper towels to clean up any mess.
• Running water to wash extensions.
• An old towel or several sheets of newspaper joined together.

Step by Step Guide to Lowlighting Your Extensions

  • Setting up a work station - Place an old towel or several sheets of newspaper over a table top to act as your work space.
  • To partition off a section of your hair that you wish to lowlight, hold your weft piece near the clip attachment and using a rat tailed comb isolate several locks of hair by weaving in and out at equal intervals (as though you were sewing through a piece of fabric).
  • Once partitioned bundle the underneath hair using a rubber band or hair band, and separate the hair to be dyed from the remainder of the hair. The clip piece should be in the middle, the uppermost hair to be low lighted on the right, and the lower most hair on the left. Lay flat on work space.
  • Repeat steps 2 & 3 so that all of your clip extension pieces are separated into sections that will and won’t be dyed.
  • Apply gloves and protective gear to ensure you don’t get dye on you and mix your semi permanent hair dye.
  • Gently massage the dye from the roots down to the tips of the hair, ensuring that at all times that you do not get hair dye on the bundle of hair that you wish to remain undyed.
  • Repeat step 6 for all clip in hair extension pieces and leave to set for the recommended time outlined on the dye box (usually around 30 minutes).
  • Remove the partitioning bands from the hair and rinse the hair dye out of the hair extensions using warm water. Next, gently apply the conditioner that came with the hair dye and allow it to soak in for approximately 5 minutes. Rinse with warm water and gently comb hair with a wide toothed comb.
  • Leave to air dry and then style as desired.

Highlighting Your Extensions

If you wish to apply highlights to lighten and brighten your hair extensions, simply purchase a permanent hair dye that is lighter in color then the hair extensions and use the steps outlined above. Semi permanent hair dyes usually do not have bleaching agents in them, but permanent dyes often do, and as a result they can lift the hair color up to a lighter shade.
Useful Tips

  • Be very cautious when highlighting your extensions, as they can easily become damaged, so consulting a hair dresser first, and highlighting a sample of the hair prior to the whole set is always a great idea. DIY kits often are far inferior to products used by hair dressers and they may failure to produce the results you desire.
  • Be sure that you also purchase a good quality leave in moisturising product or Moroccan oil, so that you can apply a light coat to the extensions after having dyed them. This will help to re-hydrate the hair extensions.
  • After having dyed the extensions it is always a good idea not to shampoo the extensions within the first 48 hours, so as to allow the dye to permeate the hair. If you shampoo the extensions too soon after having dyed them, or wash them too frequently, the color will fade.
  • Find out more about the best dyes for your hair.
  • If you liked the information you have just read please click on either the Google Plus button or face book like button located at the top of this page to support us. Thank you so much.

Thursday, September 5, 2013

Keep the high quality with hair extensions


Hair extensions originated from Europe . Hair extensions are that put some beautiful hair into your real hair; extended hair can be real and false, having different color and various styles.
In our daily life, something important should be done to protect the extended hair in order to keep the quality of it.

  • You should decrease the chance to go out to avoid the hair being stained with dust which makes you increase the number of washing hair. 
  • Controlling the sports is also important. 
  • You should avoid sweating profusely or the hair extensions will be damaged. 
  • Eating more bean products is beneficial to repair the damaged hair. 
  • If you extent black hair, eating carp can make you hair become pitch-black. 
  • What’s more, wearing cap and hat is very airtight, which make dandruff grown. 
  • Using salt water to wash hair is good for removing hair itching. 
  • Scratching hair is harmful to the extended hair, because it is very easy to break the hair.

It’s very significant to know how to use and chose shampoo and hair conditioner. We begin to talk about shampoo first. We should use hotter water after using repair-series shampoo. On the contrary, colder water should be used after using hair conditioner because the hair scales draw with the cold water so that it can lock the moisture and nutrients. Washing with beer instead of shampoo also protect the extended hair and make hair brighter.
The longest shelf life of hair extensions can last 3 months. How can we make the shelf life as long as possible? I will tell you something you do not know. The ways are as follows:
Combing hair with wide comb gently which can avoid hair falling down.
If you want to strengthen the quality of hair, you should wash your hair by tea.
Most importantly, don’t let your hair exposure to the sun.
The shampoo is very easy to stay into the extended hair; therefore, you shall spend more time in washing the hair with water.
Hair extensions are a fashion.We must go with the times, and go as others do nowadays. Hair extensions are used in daily by lots of people. They want to use it to make their hair style change through different length and colorful hair. Hair extensions can make normal people become outstanding. Artists always have hair extensions. The difference is that artists change their hair in a short period of time for performance.
Do you like hair extensions? I like it very much. I feel like having hair extensions very much.

Wednesday, August 7, 2013

How To Make The Wigs Fit Yourself Better


Wigs can give women a whole new look without the added hassle of having to dye his hair or wait for hair to grow out. A wig can be worn every day or for a special occasion. Making a few simple adjustments to ensure a wig fits properly makes all the difference in the appearance of a person, for an ill-fitting wig looks fake.
Pin hair back with bobby pins. Separate the hair into sections and clip hair in place near his head. Use enough forks to make sure your hair does not stick to the sections, which interferes with the fit of the wig. If you have long hair, put your hair in a ponytail with a hair rubber. Turn the ponytail into a bun on top of her head. Pin bread instead.
Age take pantyhose and use the elastic part as a lid to cover the hair once held in place. Cut the pantyhose leg pieces with scissors before putting the elastic in the head.
Use a wig covering as an alternative to pantyhose. Place the lining of the wig on his head once fixed in place. Place the wig on the head to the side, in the right direction by holding the wig on the label and by tilting the head forward as he pulled the wig. Pull the wig back down once the wig is on your head. Make sure the wig is put in the middle of the forehead and pulled down over your scalp, like swimming or shower cap.
Adjust the human hair wigs so it is even with the scalp, once it is firmly in your head. Look in a mirror while doing this to ensure that the wig looks directly. Adjust the wig if it seems to be uneven or crooked. Use the wig for a few minutes and see how you feel. Wigs that fit well should be comfortable, but not too tight or uncomfortable.
Pin the lace front wigs to your own natural hair to keep the wig in place. Take a fork and place the wig over your own hair, being careful not to scratch the scalp. Place the fork on a discrete section of the wig you can not see. Use bobby pins that are the same color of the wig, if possible. Put a fork in the front and one in the back to secure the wig once it's installed properly.
Wig style with the brush carefully. Use a wig brush and wig style hair with the brush on the sides of the wig front and flattering style. Brush the hair on the seams that can be displayed and give the body real lace wigs. Be careful not to pull the head wig while styling.

Thursday, July 25, 2013

Beauty Road Test for Get Thick Hair


After a lifetime of good, "nothing" fine hair that always teasing and permanent need for any volume, I did: I have hair extensions. I had 200 groups glued hair short hair. Have you made a difference? It's been almost two weeks since my hair improvements, but still sees hidden from myself to believe I actually went through it.
It looks great, and get hair extensions for thin hair changed my life. Just the other day I was to meet a friend for lunch and suddenly I have a lot of wind and it began to drizzle. Without an umbrella instinctively got into a door because even a few drops of water were long enough for my hair to get matted down flat. For those of us who are "follicly challenged," caught in any kind of bad weather is a nightmare. Then I remembered I do not have to hide from the rain. I scrunched my hair and kept going. It was fabulous. An absolute first!
For years, Gretchen, my old friend and fellow thin hair, is the only person who was comfortable talking about this. We have gone from a silly buying sprees together add-on hair and tried more products to "thicken lifeless hair" than I can remember. All to no avail. Here we were, two calls intelligent women who wear little or no makeup, and I liked the way I expected "- but we were always scrounging around for the next new hair product or breakthrough. But I always stayed away from complicated procedures. So that what finally tipped the scales for me? still not sure I know. Maybe it was just wishful lifetime to know what it feels like to wake up in the morning and see the wild hair instead of separate fine strands, honed-down.
However, while I did my courage appointment fear quickly faded as I sat in the chair. It's amazing how very personal and emotional the whole process. At first I was a little embarrassed and did not want to talk to Diane, I just wanted her to do his thing and be done with it. She insisted and took me to talk about how I wanted my hair to look. He talked about how it made her feel to be able to help women look or style that I had never known before. In no time I felt very connected to Diane. I realized that no one else can be trained in a procedure, but it takes a truly unique person to become a partner in a firm so personal.
She took me through each step and explained that the hairs were glued or attached to my hair with a protein polymer and the heat does not damage the hair. Multiple strands of hair stick together. Diane told me that the places where they join hairs may feel a little strange "- as do nail extensions at first '- but that would soon be used. Would also keeps reminding me the fullness and density, not altitude. And every hour or so, I was up and walking. binding process lasted four hours.
All oohed and exclamations in hair quality I was putting in. (Since I still had something permanent in my hair, perm Diane decided to Great Lengths hair before putting it on, so you could wear your hair curly or off. Turns an excellent idea.)
He then joined the hair, Diane cut and styled my hair. By then, however, as they wanted to get home and find out if you really loved me or if he had been silly and vain.
In the end, I like to have more hair, but it took me a while to get used to playing the polymers "connectors". I like the fact that my hair looks like I've always wanted '- or almost. What I really like is the hair like 'my daughter - thick, long and curly. But that will never happen.
People tell me I look younger, and that's good. I must admit I especially like it when someone says I'm better than ever and only I know why.
Will I live with improvements? I do not know yet. Great lengths suggest you take five or six months to compensate for natural hair growth and then reapplied. I guess I'll decide then. For now, I'm enjoying what the new hair style, which actually means less design time. I can apply the products and not worry about my hair getting tangled, I can use pins and not worry that they slide out. And actually, I really do not need my hair style, you can just fluff and go.

Tuesday, July 9, 2013

Dry scalp is the most important reason of hair loss


A posterior scalp and dry hair loss is a common problem faced by many of us around the world. In some cases, the climatic conditions of the place we live in, in the other, something we are or are not eating. Sometimes, it's just our hormones. Here, you can find the causes and remedies for this common disease.
A simple explanation for dry scalp and hair loss is that when the hair is dry, it becomes brittle. In such a situation, the hair tends to break or fall more often. In addition, an itchy dry scalp. When we scratch our head, which causes the hair to weaken and fall, resulting in severe hair loss. However, dry scalp problems and hair loss are poorly understood. This is the reason why most of us get to shoot in the dark, and try out various hair treatments, without knowing the root cause of the problem. This in turn leads to other hair related problems. For example, if you use a shampoo to treat dry hair can result in hair loss as a reaction to certain ingredients. It is very important to identify your hair type and the condition it is, before you dive into the plethora of so-called "off-the-shelf solutions hair treatment.
General causes
The scalp has sebaceous glands or sebaceous glands that produce oils needed to protect the hair and give natural shine. Is when these glands start malfunction, when under-producing the necessary amount of oil required, scalp that one tends to be dry. This may occur for several reasons:

  • Weather conditions: If you live in areas where dry weather is prevalent, or during winter periods anywhere in the world, the hair tends to lose moisture resulting in a dry scalp.
  • Inadequate nutrition: Eating processed foods more often than fresh food, or not eating fresh foods at all, consuming excessive amounts of caffeine, or not drinking enough water, are important factors that could cause dry scalp. Sometimes, it may be a lack of certain vitamins and minerals needed for sebaceous glands to function properly, causing the problem of dry scalp and hair loss.
  • Frequent Shampoo: destroy harsh shampoos and conditioners hair moisture. Also carry heavy hair loss, again due to the hardness of the product ingredients. Many people assume that when washing your hair frequently will be able to absolve hair dryness problems. This is a big mistake because frequent washing removes the scalp of its natural oils and causes dryness.
  • The excessive heat exposure: Wash your hair with very hot water, or brushing hair regularly removes hair of its natural moisture, bringing dry scalp causing hair loss. Even the use of a hair straightener or curling iron will have the same effect as dryers.
  • Hard Water: Dry scalp is also caused by hard water, or water that can not be filtered thoroughly, and contains elements such as calcium and magnesium. These elements accumulate on the scalp over time, and hamper the production pattern of the sebaceous glands.
  • The effects of cigarettes and alcohol for all: Smoking and alcohol consumption. In the process of damaging the rest of the body, they also affect the hair and its natural shine. As a result, one faces the problem of dry scalp and hair loss.

Simple Home Remedies
Simple remedies for dry itchy scalp include,
  • Ensure that the shampoo and conditioner are washed thoroughly after washing hair.
  • Let the hair dry naturally after washing, avoiding the use of hair dryers / straighteners / curlers.
  • Using a clean hair brush or comb to brush her ​​hair.
  • Massaging the scalp regularly with some natural oils such as tea tree oil, coconut oil or olive oil, which stimulate production of sebaceous glands.
Hair loss caused by a dry and itchy scalp is not the only, woman or child in a man's problem. It can affect any person for reasons which may even go beyond those mentioned above. After getting a glimpse of the different causes of dry scalp and hair loss, it is important that you apply various preventative techniques to combat the disease, rather than ignore it and let it become a more serious condition. It is always best to keep your glory, rather than allow it to deteriorate, and then bring it back to its original state. Also, once these conditions affect your scalp and hair, it is very difficult to restore the original beauty of the hair. Therefore, this article should be a strong motivating factor to make you want to take good care of your hair as possible.

Thursday, June 13, 2013

Beauty tips to protect from the sun dyed hair


For our beauty some can be very useful tips to protect from the sun dyed hair. It is often exposure to sunlight is damaging to the brightness of the color, this should be remedied by using particular solutions, which help us to solve the problem of being left with bleached hair and not very bright.
Hair care for beautiful and healthy hair even to the sea is crucial. But it is not only a problem in the summer. In fact, even in winter you must take care to devote proper attention to hair health.
You can start with the proper use beauty masks that can be prepared using a compound formed from drops of milk and olive oil. A very convenient way to feed and more resilient hair. Suitable for dark colors remain intact is the coffee to be added to the mixture. Coffee is also useful against hair loss.
The hair can feel the effects of the change of season. In any case we fail to protect them by putting in place practical solutions to keep in consideration. The milk mask and olive oil may be a remedy interesting, because it is relatively easy to develop. We do not have to do is keep it applied in your head for a few minutes and our hair will recover their vitality.
Finally, we can proceed to an adequate rinse of using warm water and by stimulating with the hands scalp. Following this advice, we can think of our Wellness from all points of view.

Tuesday, May 21, 2013

DIY mask for damaged hair


Human hair always needs a proper care and attention to be healthy and gorgeous. From environmental conditions to your hairstyling tools, everything makes your hair dull and dry. Day by day, the cosmetic companies introduce newest products for dry and damaged hair. But these products are not only much-expensive but also contain harsh chemicals. By using such hair care products, your hair may look shiny and gleaming temporarily but after some time, they become lackluster on permanent basis. If you are willing to repair your damaged hair at home by using DIY treatment, try the following DIY Mask for damaged hair.
For making this DIY mask, you will need an avocado (peeled, mashed and seed removed), small banana (mashed), two tablespoons two honey, three tablespoons olive oil, one egg and three tablespoons milk. These all ingredients are easily available at your kitchen, so you don’t need to make special investment for this purpose.
Procedure
Here is a step-by-step guideline for treating the damaged hair by DIY mask.
Step 1: Place banana, egg and avocado in a large bowl and combine all ingredients thoroughly with the help of fork.
Step 2: Now add milk, honey and olive oil in the combination of avocado, banana and egg. Whisk all constituents until they mix together.
Step 3: Work the mixture through your hair using your fingers. Make it sure that all your hair and scalp are covered by the avocado mask.
Step 4: Leave the mask stay on your hair for about half hour.
Step 5: Now wash your hair using a mild shampoo. While shampooing, rub your hair with your fingers to rinse away the avocado mask.
Step 6: Apply a good-quality conditioner and allow your hair air dry. Avoid using a blow dryer as much as possible.